Section 8.1. Drawing 2D Text
public int scoreValue {get; protected set;}
Modify both constructors in the Sprite class to receive an integer value for the score
value for that sprite. The first constructor should pass the value to the second constructor,
and the second constructor should use that value to set the scoreValue member
variable.
public Sprite(Texture2D textureImage, Vector2 position, Point frameSize,
	int collisionOffset, Point currentFrame, Point sheetSize, Vector2 speed,
	string collisionCueName, int scoreValue)
	: this(textureImage, position, frameSize, collisionOffset, currentFrame,
	sheetSize, speed, defaultMillisecondsPerFrame, collisionCueName,
	scoreValue)
{
}
public Sprite(Texture2D textureImage, Vector2 position, Point frameSize,
	int collisionOffset, Point currentFrame, Point sheetSize, Vector2 speed,
	int millisecondsPerFrame, string collisionCueName, int scoreValue)
{
	this.textureImage = textureImage;
	this.position = position;
	this.frameSize = frameSize;
	this.collisionOffset = collisionOffset;
	this.currentFrame = currentFrame;
	this.sheetSize = sheetSize;
	this.speed = speed;
	this.collisionCueName = collisionCueName;
	this.millisecondsPerFrame = millisecondsPerFrame;
	this.scoreValue = scoreValue;
}
You’ll also have to change the constructors for the derived classes (AutomatedSprite, ChasingSprite, EvadingSprite, and UserControlledSprite) to accept an integer parameter for the score value and to pass that value on to the base class constructor.
The UserControlledSprite will not have a score value associated with it, because the player can’t be awarded points for avoiding himself. Therefore, you won’t need to add a new parameter to the constructor for this class, but you will need to pass a 0 to the score Value parameter of the constructors for the base class.
Finally, in the SpriteManager class, you’ll need to add the score value as the final parameter in the constructor when initializing new Sprite objects. You’re currently creating objects only of type EvadingSprite, and you’re doing this at the end of the SpawnEnemy method. Add a zero as the score value for the EvadingSprites you’re creating. (You’ll be adding some logic later in this chapter that will create different types of sprites and assign different score values to those sprites based on their types.)
You now have a way to calculate the score during the game based on events with different sprites. Even though you’re currently only using zeros as the score values, the underlying code is now there, so you can start to write some scoring logic for the game. First, you’ll need to add to the Game1 class a variable that represents the total score of the current game:
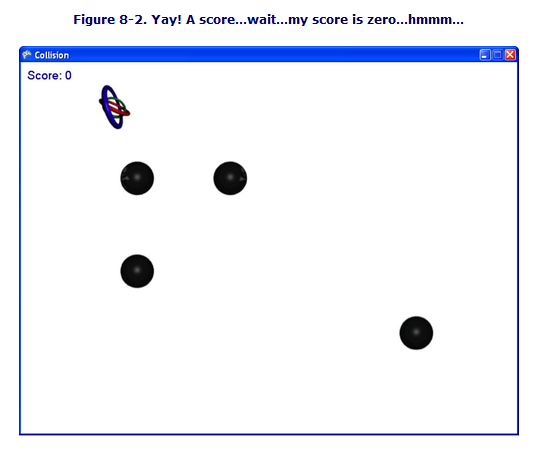
int currentScore = 0;Now you’re ready to draw the score on the screen. Drawing text in 2D is done in a very similar manner to the way that you draw sprites. For every frame that is drawn, you will draw text on that frame using a SpriteBatch and an object called a SpriteFont. When drawing 2D images on the screen, you specify an image file to use and a Texture2D object to hold that image. XNA then takes the image from memory and sends the data to the graphics card.
The same thing happens when drawing with SpriteFont objects. In this case, a spritefont file is created. This is an XML file defining the characteristics of a given font: font family, font size, font spacing, etc. A SpriteFont object is used in memory to represent the spritefont. When the SpriteFont object is drawn, XNA will build a 2D image using the text you want to draw and the font specified in the XML file. The image is then sent to the graphics device to be drawn on the screen.
Sprite.cs
AutomatedSprite.cs
ChasingSprite.cs
EvadingSprite.cs
UserControlledSprite.cs
Change the constructors for the derived classes to accept an integer parameter for the score value and to pass that value on to the base class constructor.
Constructors for the ChasingSprite class
public ChasingSprite(Texture2D textureImage, Vector2 position,
    Point frameSize, int collisionOffset, Point currentFrame,
    Point sheetSize, Vector2 speed, string collisionCueName,
    SpriteManager spriteManager, int scoreValue)
    : base(textureImage, position, frameSize, collisionOffset,
    currentFrame, sheetSize, speed, collisionCueName, scoreValue)
{
    this.spriteManager = spriteManager;
}
public ChasingSprite(Texture2D textureImage, Vector2 position,
    Point frameSize, int collisionOffset, Point currentFrame,
    Point sheetSize, Vector2 speed, int millisecondsPerFrame,
    string collisionCueName, SpriteManager spriteManager,
    int scoreValue)
    : base(textureImage, position, frameSize, collisionOffset,
    currentFrame, sheetSize, speed, millisecondsPerFrame,
    collisionCueName, scoreValue)
{
    this.spriteManager = spriteManager;
}
Finally, in the SpriteManager class, you’ll need to add the score value as the final parameter in the constructor when initializing new Sprite objects. You’re currently creating objects only of type EvadingSprite, and you’re doing this at the end of the SpawnEnemy method. Add a zero as the score value for the EvadingSprites you’re creating. (You’ll be adding some logic later in this chapter that will create different types of sprites and assign different score values to those sprites based on their types.) The code that creates your EvadingSprite objects in the SpawnEnemy method should now look like this:
spriteList.Add(
    new EvadingSprite (Game.Content.Load(@"images\skullball"),
    position, new Point(75, 75), 10, new Point(0, 0),
    new Point(6, 8), speed, "skullcollision", this, .75f, 150, 0));
You now have a way to calculate the score during the game based on events with different sprites. Even though you’re currently only using zeros as the score values, the underlying code is now there, so you can start to write some scoring logic for the game.
First, you’ll need to add to the Game1 class a variable that represents the total score of the current game: Game1.cs int currentScore = 0;
Now we can draw the score on the screen. This parallels how we drew sprites. For every frame that is drawn, you will draw text on that frame using a SpriteBatch and an object called a SpriteFont.
A sprite-font file is created. This is an XML file defining the characteristics of a given font: font family, font size, font spacing, etc. A SpriteFont object is used in memory to represent the spritefont. When the SpriteFont object is drawn, XNA will build a 2D image using the text you want to draw and the font specified in the XML file. The image is then sent to the graphics device to be drawn on the screen.
When drawing the game score, you’ll want to use the value of the currentScore variable.
As the variable’s value changes, the score on the screen will be updated.
To draw text on the screen using a SpriteFont, you need to add a SpriteFont resource
to your project.

Note: Spritefonts are resources that are picked up and processed by the content pipeline. As such, they must be created within the AnimatedSpritesContent project of your project.
In SpriteManager we distribute: 75+20+5=100%
Now you have to add some code that will generate a random number and, based on
the value of that random number, create one of the three sprite types.
Following the lengthy instructions pp. 133-139 in our textbook to include the 6 sprites and their sounds.
boltcollision.wav
Your SpriteManager class was built to handle animated sprites and derived classes.
Something as simple as a background image can just be added to your Game1 class. You’ll
need to add a Texture2D variable for the image:
Read pp. 140-147 for the details in handling the scoring.
Regardless of the specifics, the game moves through different states, and in
those different states the game behaves differently. One way to implement splash
screens and game-over screens is by making use of these states.
To define some states for your game, you’ll need to enumerate the different possible
states that the game can have. Create an enum variable at the class level in your Game1
class. Currently, you have only three states in your game: Start (where you display your
splash screen), InGame (where the game is actually running), and GameOver (where you’ll
display your game over screen). You’ll also need to create a variable of that enum type
that will hold the current state of the game. You’ll want to initialize that current state
variable to the game state representing the start of the game: In Update method of Game1 class:
Also modify Draw
For the purposes of this book, the effects that these objects will have when they collide
with the player object are as follows:
By default, XNA 4.0 uses a font named “Kootenay” when creating a new spritefont. You can change the type of font used in your spritefont by editing the file and changing the name of the font found in the line of code that reads
xbox.create.msdn.com/en-US/contentpack/fontpack
Note: The fonts in this pack are included automatically as part of installing XNA Game Studio 4.0. If you are using XNA Game Studio 4.0, you do not need to download this pack. The pack is provided for the benefit of users of XNA Game Studio 3.0 and 3.1.
redistfonts.png Click to see them all
When the time comes to share your game with others, it will be important to have a "redistributable" version.

Section 8.2. Randomly Generating Different Sprite Types
To randomly generate sprites of different types, you first need to determine the likeli- hood that each type will be created. Most of the sprites in this game will be Automated Sprite s. ChasingSprite s will be the next most common, and EvadingSprite s will show up only occasionally. In this section, you'll be assigning a percentage likelihood to each type of sprite.
int likelihoodAutomated = 75;
int likelihoodChasing = 20;
int likelihoodEvading = 5;
Section 8.3. Adding Some Variety to Your Sprites
Within this chapter’s source code (in the
AnimatedSprites\AnimatedSpritesContent\Images folder), you’ll find some sprite sheet files for the different types of sprites.
fourbladescollision.wav
pluscollision.wav
threebladescollision.wav


![]()
![]()
Section 8.4. Adding a Background Image
With
the source code for this chapter (again, in the
AnimatedSprites\AnimatedSpritesContent\Images folder), you will find an image named background.jpg. Add the
image to the project the same way you added the other images (right-click the
AnimatedSpritesContent\Images folder, select Add->Existing Itemc..., and navigate to the background.jpg image included with the source code).
Texture2D backgroundTexture;
and load the Texture2D image in the LoadContent method:
backgroundTexture = Content.Load
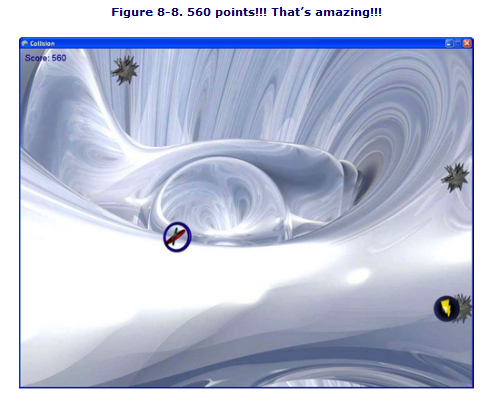
Next, you’ll need to add the code to draw the image. Because you’ll now have multiple
sprites being drawn within your Game1 class (the SpriteFont counts as a sprite, so you’ll
be drawing a score sprite as well as a background sprite), you need to make sure that
the score text is always on top of the background image. Typically, when trying to
ensure that one sprite is on top of another, you modify the SpriteBatch.Begin call to
include an appropriate SpriteSortMode. However, this is a case where you’re drawing
only two items, and you know that you’ll always want to draw the score on top of the
background. As such, you can forego the overhead involved in specifying a sort mode
in the Begin method, and instead always draw the background first and then the score.![]()
Section 8.5. Game Scoring
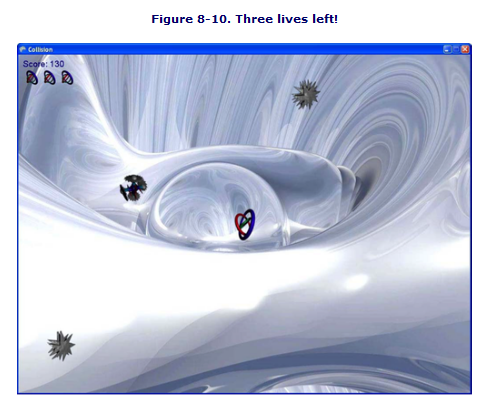
The first thing you need to do is determine what event(s) will trigger a change in score. For this game, you’ll be updating the score whenever the user successfully avoids a three-blade, four-blade, skull ball, or plus sprite. You actually have already added the logic to determine when one of those sprites has been successfully avoided; it lies in the code that deletes the sprites
when they disappear off the edge of the screen. If a sprite makes it across the screen and needs to be deleted, that means the user has avoided that sprite, and if it was a
three-blade, four-blade, skull ball, or plus sprite, you need to give some points to the
user.

Section 8.6. Game States
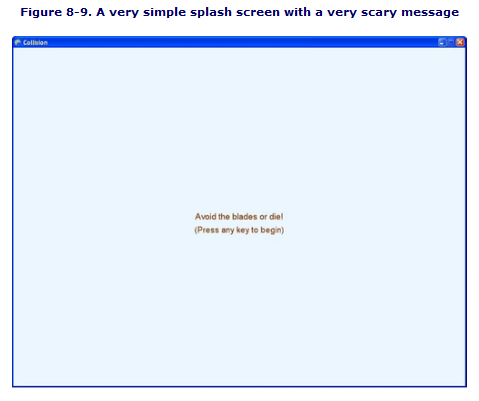
Your game is coming along, but there has to be a way to end the game. Typically, when
a game ends, the game window doesn’t just disappear; usually there’s some kind of
game-over screen that displays your score or at least lets you know that you’ve failed
(or succeeded) in your mission. That’s what you need to add next. While you’re at it,
it’s also common to have the same kind of thing at the beginning of the game (perhaps
a menu enabling the player to select options, or at least a splash screen presenting
instructions and maybe displaying your name as the author of this great game).
enum GameState { Start, InGame, GameOver };
GameState currentGameState = GameState.Start;
You’re going to want to separate the logic in the Update and Draw methods to
allow you to write specific code that will run only in certain situations, depending on
the current state of the game. You can do this by adding a switch statement to both
methods with different case statements for each possible game state. Then, when you
want to write specific code to update or draw items that should take place only in a
given game state, you add that code to the Update or Draw methods within the case for
that particular game state.
protected override void Update(GameTime gameTime)
{
// Only perform certain actions based on
// the current game state
switch (currentGameState)
{
case GameState.Start:
break;
case GameState.InGame:
break;
case GameState.GameOver:
break;
}
// Allows the game to exit
if (GamePad.GetState(PlayerIndex.One).Buttons.Back ==
ButtonState.Pressed)
this.Exit( );
audioEngine.Update( );
base.Update(gameTime);
}
Section 8.7. Enabling/Disabling GameComponents
There are two properties that can be used to enable and disable a GameComponent. The
Enabled property of a GameComponent will determine whether its Update method is called
when the game’s own Update method is called. Likewise, the Visible property of a
DrawableGameComponent will determine whether its Draw method is called when the
game’s Draw method is called. Both of these properties are set to true by default. Go to
the Initialize method in your Game1 class and set both properties to false immediately
after adding the component to your list of game components (added lines are in bold):
spriteManager = new SpriteManager(this);
Components.Add(spriteManager);
spriteManager.Enabled = false;
spriteManager.Visible = false;

Section 8.8. Game-Over Logic and the Game-Over Screen


Section 8.9. Fine-Tuning Gameplay

Section 8.10. Creating Power-Ups
You have three sprites that don’t do anything at this
point: the skull ball, the plus, and the bolt. These sprites are meant not to take away a
player’s life when they collide with the player’s object, but rather to have some positive
or negative effect on the player.
• The bolt causes the player object to move at 200% of its current speed for 5 seconds.
• The skull ball causes the player object to move at 50% of its current speed for 5 seconds.
• The plus causes the player object to be 200% larger than its current size for 5 seconds
Section 8.11. What You Just Did
Wow. Maybe this should say, “What didn’t you do?” This was a long chapter, but you
did some great stuff. Let’s take a look:
• You learned how to draw 2D text on the screen.
• You randomly generated sprites of different types.
• You added a background image.
• You fleshed out a system to keep score.
• You experimented with game states and implemented three states (start, in-game, and end).
• You added splash and game-over screens using game states.
• You added power-up effects and fine-tuning logic to your game
Section 8.12. Summary
• 2D fonts are drawn on the screen just the same as any Texture2D object.
• 2D fonts are built using the SpriteFont object.
• Background images are added to games by using a sprite that covers the entire screen.
• Game states are breaks in gameplay or transitions in gameplay from one state to another (for example, moving from one level to another, accomplishing a mission, losing the game, or something similar in concept).
• Game development is a very creative business. While the mechanics are very scientific, as in all programming, the actual fine-tuning of the game is a very artoriented craft that is heavily centered on how the gameplay feels to a user.
As a developer, you should play with your game as early and often as possible so that you can tweak the experience into something that you enjoy and that you envision others will enjoy as well.
• “Our mental discipline is matched only by our skill in XNA…I only hope these are enough to withstand this awful trial.” —Akara
Section 8.13. Test Your Knowledge: Quiz
1. What type of object is used to draw 2D text in XNA?
2. How is a background image different from an image used to represent a player or object in the game?
3. What are game states and how are they used?
4. In the Flight of the Conchords episode “Mugged,” what do the muggers steal from Jemaine?
Section 8.14. Test Your Knowledge: Exercise
Change the behavior of the skull power-up (or power-down, if you prefer) to freeze the
player for 2 seconds rather than reduce the player’s speed by 50% for 5 seconds. Use
different power-up timers for the skull, bolt, and plus sprites.